Hello, viewers in this article we are going to tell you How to Install MacOS High Sierra on Virtualbox. as you know installing MacOS High Sierra is not an easy task, where we have searched much time and so far we could not find out a good solution. but finally, we are here to give you the easiest way to install MacOS High Sierra in Virtualbox. if you are looking for MacOS High Sierra then read our article carefully and follow all the steps. because here you will get what you need and for what you are looking for is all here.
What is MacOs High Sierra?
MacOs high sierra is the latest version of Apple’s system for Mac. and in worldwide developer’s conference, Apple introduced high sierra in 2017 on June 5, 2017, before being released on September 25, 2017. although this system is the fourteenth major released of MacOs, apple inc’s desktop operating system for Macintosh computers.
With MacOS High Sierra, Apple says that it’s focusing on the fundamental like video, data, and graphics. High Sierra is about deep technologies that provide for future innovation. while it’s also introducing new technology to make the Mac more reliable, capable, and responsive.
Step 1. Download MacOS High Sierra
Download MacOS High Sierra from below link, the link is in zip file after downloading extract the file and use it.
macOS High Sierra 10.13.6 Final (One Full)
macOS High Sierra 10.13.6 from Mega
Moreover, you can check the article related to download the MacOS High Sierra DMG file and you will find everything about MacOS High Sierra.
Step 2. Create a New Virtual Machine
firstly, you need to create a new virtual machine for that you have to install Virtualbox in your computer as we have an article about How to install Oracle Virtualbox 6.0 on Windows 7/8/10. inside this article you will get a VirtualBox download link, you can download it from there.
while you have installed Virtualbox successfully then run Virtualbox and follow these steps.
1. open Virtualbox
2. click on the “New” option.

Click On New
3. after that set a proper name for your virtual machine as I put MacOs High Sierra. while you set the name then its type and version will set automatically. if not then do it yourself.
Set Proper Name
4. then set memory size of 4MB, it should be more than 2MB because the recommended memory size is 2MB.
Set Memory Size
5. to create a hard disk you have to select the last option then click on the file icon and open the file you have downloaded earlier from the above link.
sweet, your VM is created successfully now you need to configure some settings, go to setting and follow these steps that shown in a picture.

Open Virtual Hard Disk
Note: close Virtualbox and restart it to proceed with the next steps.
Step 3. Configure your Virtualbox from the command prompt
before configuring your Virtualbox from the command prompt, you need to bring little changes to the code.
1. replace the phrase “your Virtual Machine Name” in the code below with your Virtual Machine Name that shown in Setting->General->Basic.
copy the code below and paste it on the notepad after that change the phrase with your virtual machine name then save it as .txt format.
afterward, go to windows and search cmd, after that right-click on cmd and run as administrator.
now run each code line one by one.
Code for Virtualbox 5.x.x
cd "C:\Program Files\Oracle\VirtualBox\"
VBoxManage.exe modifyvm "Your Virtual Machine Name" --cpuidset 00000001 000106e5 00100800 0098e3fd bfebfbff
VBoxManage setextradata "Your Virtual Machine Name" "VBoxInternal/Devices/efi/0/Config/DmiSystemProduct" "iMac11,3"
VBoxManage setextradata "Your Virtual Machine Name" "VBoxInternal/Devices/efi/0/Config/DmiSystemVersion" "1.0"
VBoxManage setextradata "Your Virtual Machine Name" "VBoxInternal/Devices/efi/0/Config/DmiBoardProduct" "Iloveapple"
VBoxManage setextradata "Your Virtual Machine Name" "VBoxInternal/Devices/smc/0/Config/DeviceKey" "ourhardworkbythesewordsguardedpleasedontsteal(c)AppleComputerInc"
VBoxManage setextradata "Your Virtual Machine Name" "VBoxInternal/Devices/smc/0/Config/GetKeyFromRealSMC" 1
Run Code in CMD
Step 4. Run Virtual Machine
everything is done, now you have to open the virtual machine and click on the start option, which will run your newly created virtual machine with the new MacOS High Sierra.
even you will see black and white text, so don’t worry it’s doing the thing, just wait for some minutes.
Start VM
1. here select your language and click on the arrow button. after that click on the Disk Utility.
2. you won’t see the drive don’t worry click on the view menu and click on the show all devices.
Show all devices
3. on the sidebar you will see your drive so now click on the erase and put Macintosh HD on the name field. besides that, leave other options as default and click on the erase button.
Erase option
4. select reinstall MacOS and click on the continue button. then it will ask you to agree on the term, so click on the agree button.
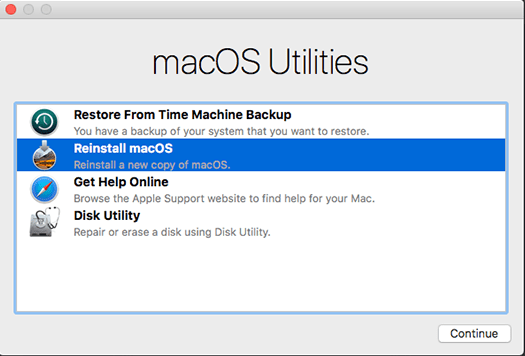
Reinstall MacOS
6. select Disk and click on the install button.
Select Disk
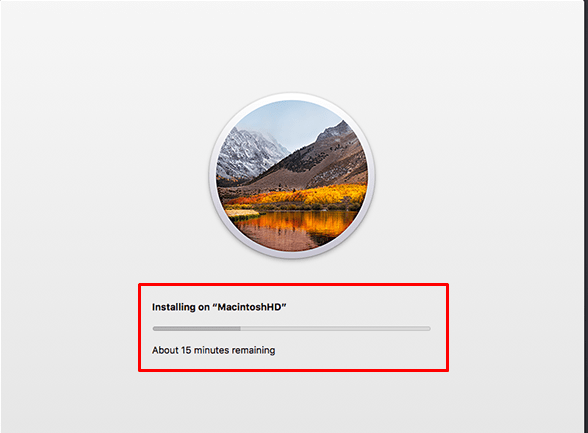
Installing MacOS
7. afterward, VM will reboot again this time into MacOS High Sierra. so after that choose your country, setting up a user account, and the rest of the initial process.
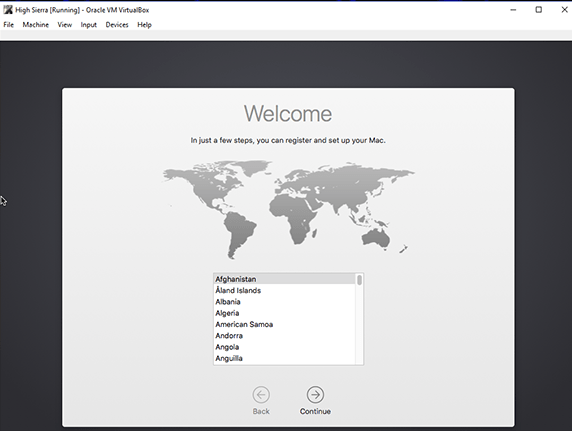
Choose Your Country
8. here you have installed MacOS High Sierra successfully. now you can give a try to mac and download lots of software and use it with MacOS.
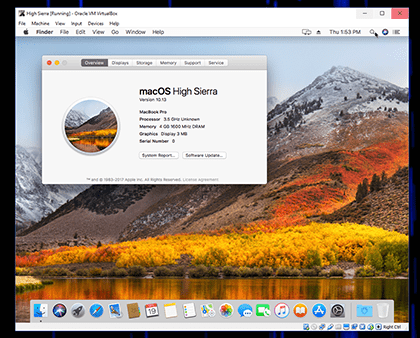
In Conclusion
this article tells you the easiest way to install MacOS High Sierra in Virtualbox. read each line carefully and follow each step to not face problems.


0 Comments